Photo by Lauren Heaton on Pexels
Sourdough Bread
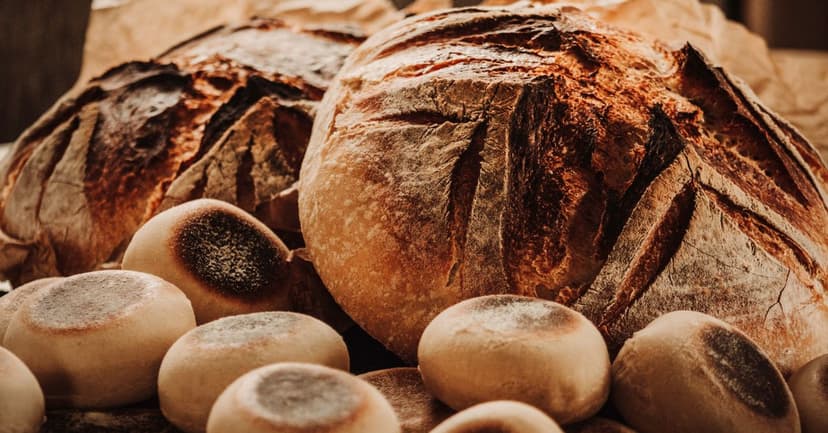
A crusty, open-crumbed sourdough loaf raised with nothing but a wild-yeast starter, with a week-long method for making the starter from flour and water.
- 500 g strong white bread flour (for the loaf)
- 350 ml warm water (for the loaf)
- 100 g active sourdough starter (made below)
- 10 g fine sea salt
- 2 tbsp rice flour
- 50 g wholemeal flour (to start the starter)
- 330 g strong white bread flour (to feed the starter)
- 380 ml lukewarm water (to feed the starter)
Shop these in one order
Mello puts these ingredients on one shopping list with the rest of your week, and anything two recipes share is added together. The list then goes to Sainsbury's in the UK or Careem Quik in the UAE.
Add to a shopping listHow the shopping list works →Make the starter (one-off, about 7 days)
- Step 1
Day 1: in a clean 1 litre jar, stir 50 g wholemeal flour with 50 ml lukewarm water to a thick paste with no dry flour left. Rest the lid on top without sealing it, because the gas the starter makes needs to escape. Leave the jar at 22 to 26°C for 24 hours. A cool kitchen is the most common reason a starter is slow, so choose a spot near, but not on top of, something that stays warm.
- Step 2
Day 2: stir the mixture hard, re-cover and leave it for another 24 hours. A few bubbles and a sour or sharp smell are normal at this stage. Do not feed it yet.
- Step 3
Days 3 to 7, once a day at about the same time: tip all but 50 g of the mixture into the bin (not the sink, where it can clog the pipes), then stir in 50 g strong white bread flour and 50 ml lukewarm water until smooth and the thickness of pancake batter. Mark the level with an elastic band so you can see how far it rises, and cover loosely.
- Step 4
The starter is ready when, 4 to 8 hours after a feed, it has doubled in height, the top is domed and bubbly and there are bubbles right through when you look at the side of the jar. It should smell pleasantly tangy, like yoghurt or ripe fruit. This usually happens around day 7, but a cool kitchen can take up to 14 days, so keep feeding daily until it does. A grey liquid on top only means it is hungry, so stir it in and feed as normal. Pink or orange streaks, or fuzzy mould, mean it should be thrown away and restarted.
- Step 5
Build the starter for the loaf about 8 hours before you want to mix the dough, so first thing in the morning. Tip all but 40 g into the bin and stir in 80 g strong white bread flour and 80 ml lukewarm water. By mid-afternoon it should have doubled and look domed and full of bubbles. Use 100 g in the dough. Keep the rest in a clean jar in the fridge, feeding it once a week by discarding all but 50 g and stirring in 50 g flour and 50 ml water. Feed it twice at room temperature before your next bake.
Make the dough (about 24 hours, mostly unattended)
- Step 1
Plan the timing before you start. Mix the dough in the afternoon, shape it in the late evening and let it prove in the fridge overnight, then bake the next day. From mixing to slicing takes about 24 hours, and most of it is waiting.
- Step 2
In a large bowl, stir 350 ml hand-warm water with the 100 g of active starter until the water looks cloudy and the starter has dispersed. Add 500 g strong white bread flour and mix with a spatula or wet hand until no dry flour remains and the dough looks shaggy. Cover and leave for 30 minutes. This rest hydrates the flour and makes the dough easier to handle.
- Step 3
Sprinkle 10 g fine sea salt over the dough. With a wet hand, pinch and squeeze the dough for about a minute to work the salt in, then fold it over itself a few times. Cover the bowl.
- Step 4
Leave the bowl at 22 to 24°C for the bulk ferment. During the first 2 hours, do four sets of stretch-and-folds, one every 30 minutes. For each set, wet your hand, lift one edge of the dough until it stretches, fold it over the middle and turn the bowl a quarter turn. Repeat until you have folded all four sides, then re-cover. After the fourth set, leave the dough alone.
- Step 5
Total bulk time is roughly 5 to 6 hours, less in a warm kitchen and more in a cold one, so judge by the dough rather than the clock. It is ready when it has grown by about half (not doubled), looks domed with bubbles at the edges and on the surface, and wobbles like jelly when you shake the bowl. Dough left too long turns slack, sticky and sharply sour, and bakes into a flat loaf.
Shape and prove
- Step 1
Turn the dough onto a very lightly floured surface. Fold the four sides into the centre, flip it seam side down and, with cupped hands, drag it towards you in short arcs until it forms a taut ball. Cover and rest for 25 minutes.
- Step 2
Dust a 22 cm banneton, or a bowl lined with a clean tea towel, generously with rice flour, which sticks less than wheat flour. Flip the dough smooth side down, fold the sides into the middle again, pinch the seam shut and turn it over, tightening the ball with cupped hands. Lower it into the basket seam side up. Cover with a shower cap or large bag and refrigerate for 12 to 16 hours, or up to 24. The cold slows the fermentation, deepens the tang and firms the dough so it holds a score.
Bake
- Step 1
Put a 4 to 5 litre lidded cast-iron casserole in the oven and heat to 250°C (230°C fan) for a full 45 minutes. The knob on the lid must be metal, as plastic will melt at this temperature. A properly hot pot traps steam around the loaf and gives it its final burst of rise.
- Step 2
Cut a sheet of baking paper slightly larger than the dough. Turn the dough out of the basket onto the paper, smooth side up, and dust the top with a little flour. Score it with a sharp knife or razor blade, about 1 cm deep, in one confident curved slash. Without a score, the loaf will burst open wherever it likes. Using the paper as a sling and oven gloves, lower the dough into the pot and put the lid on.
- Step 3
Bake covered for 20 minutes. Reduce the oven to 220°C (200°C fan), remove the lid and bake for another 20 to 25 minutes, until the crust is deep golden brown. The base should sound hollow when tapped, and a probe in the centre should read 96°C or more. A pale crust tastes flat, so lean towards a darker bake.
- Step 4
Lift the loaf onto a wire rack and leave it for at least 1 hour before cutting, because the crumb is still setting as it cools and an early slice will be gummy. Store cut side down on a board for up to 3 days, or slice and freeze for up to 3 months.
Cook it with Mello
Cook mode reads each step aloud and keeps your screen awake, so you can cook with your hands full.
Cook it with MelloProtein, carbs and fat for this dish
Mello works the macros out from each ingredient, per serving. Make a free account to see them.
See the macrosHow Mello works out macros →